Step 1
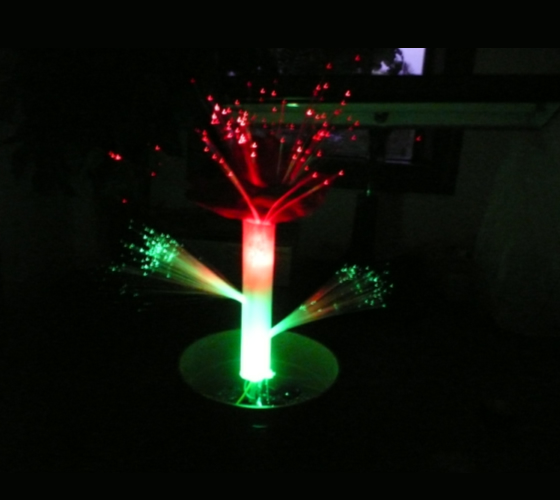
Using a few LEDs and really cheap fiber optics, I made this dead sexy illuminated fiber optic rose and I’ll show you exactly how it’s done.
Step 2
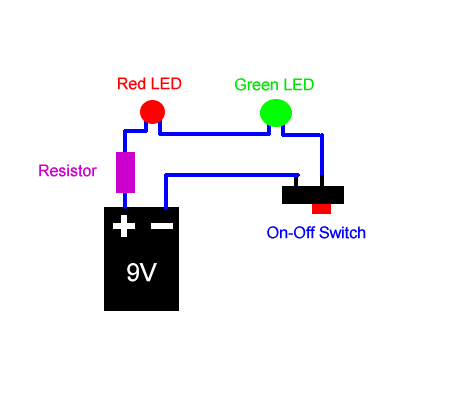
Wires, solder, and soldering gun (of course)
1 green led (I used 6000mcd) – Found online
1 red led (6000mcd) – Found online
On-Off Switch – (a few bucks at RADIO SHACK)
Fiber Optics – I salvaged mine from a UFO Toy I found on Ebay.
Silk Rose
Plastic Tube – (ACE HARDWARE) Mine was clear but I sprayed glass frosting spray
paint on it (HOME DEPOT)
9 V battery
Resistors
Optional:
Plastic flower pot (found basically anywhere)
Decorative Pebbles (found at local crafts store)
Step 3
Shame on me, I didn’t take a picture of the finished circuit. However it’s pretty self explanatory if you look through the pictures and the schematic. Solder it up!
Step 4
Step 4
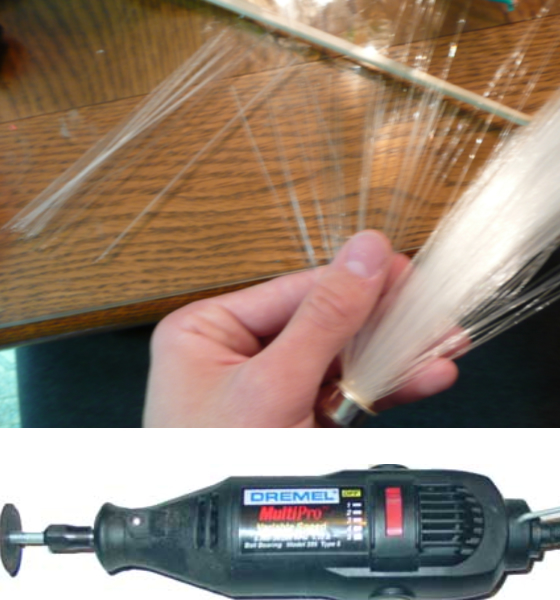
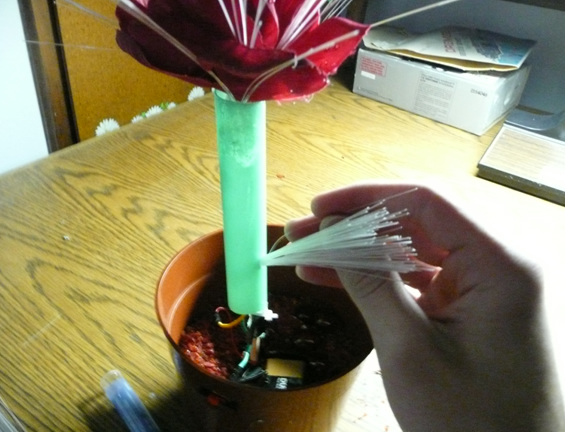
Cut your tube (stem) to whatever length you’d like. Originally, I used a ј” diameter tube, but there wasn’t enough room for the wires as well as the fiber optic strands to fit inside. I had to scrap that idea, and use 3/4” diameter tubing. Drill (or use your dremel) to bore two holes in the side of the tube. Cut your fiber optic strands to length as well. Be sure to purchase lots of fiber optic strands! Also, you can also cut out a spot on your plastic flower pot for your on-off switch to fit into.
Step 5
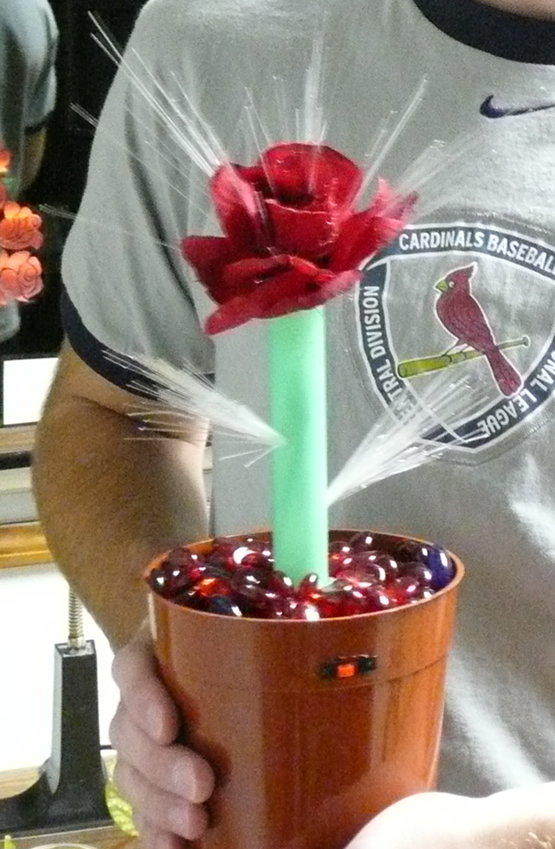
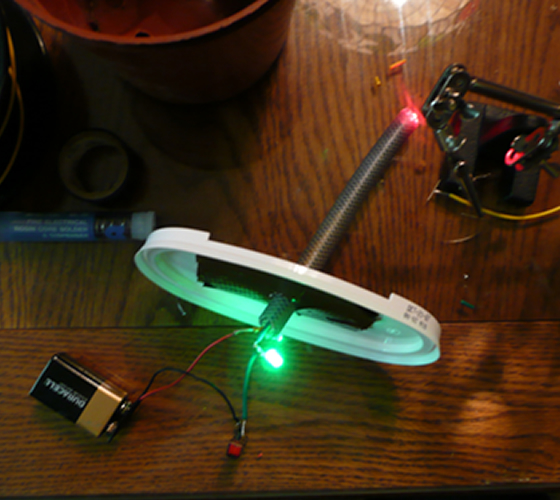
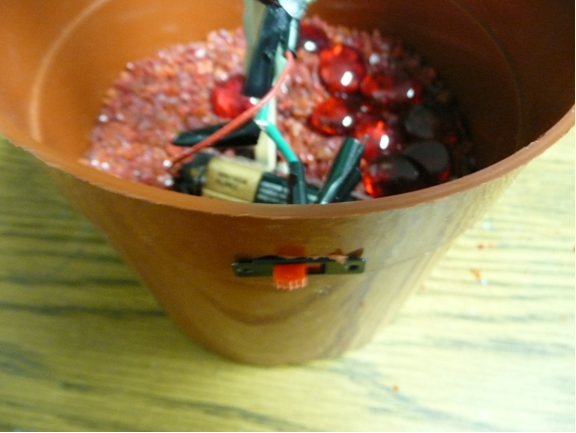
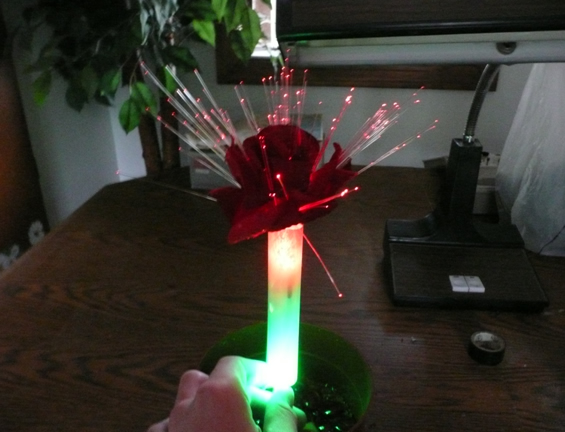
Fill the bottom of the pot with pebbles – then hot glue a stick (I used a chopstick) to the inside of your tube to hold it up in the pot. Shove the red led up the tube to the top. Then secure the green led to the base of the tube. (I used wire ties and tape.)
Step 6
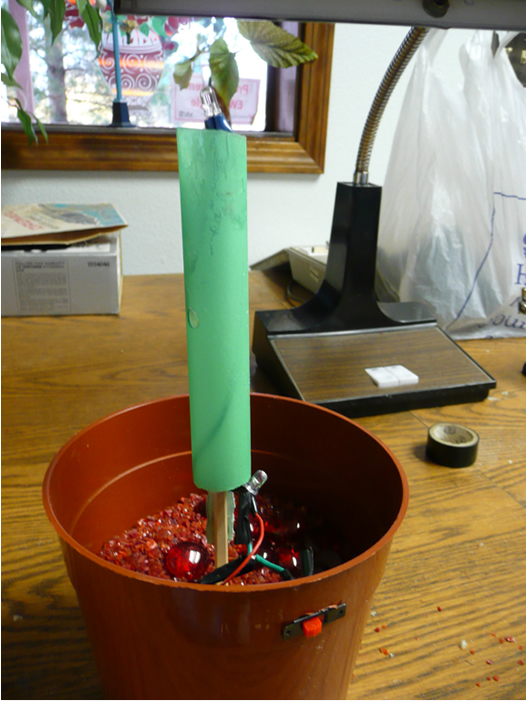
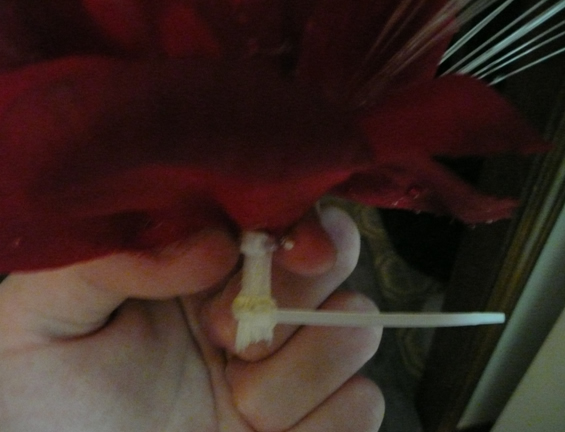
Make the Flower! I used a silk rose. Luckily, it was made of layers of silk which I could take apart piece by piece. I placed strands of fiber optic between each layer, then hot glued the layer back on. Then placed more strands after that layer, and then glued on the next layer, etc. At the bottom of the flower, where all the fiber optic strands came together, I held them together using wire ties. This way, the red LED can shine directly into each one. Tape the base of the rose (the fiber optics tied together with the wire ties) to the red led. This way, the red led stays at the top of the tube and it also ensures that the LED is shining directly into the fiber optics, illuminating the strands.

Step 7
Make your fiber optic leaves. Basically, I taped the bottom of the tube, then shoved my fiber optic strands into the holes that I dremeled into the side of the tube. The light from the green led at the bottom travel up through the fiber optic strands, illuminating the ends.
Step 8
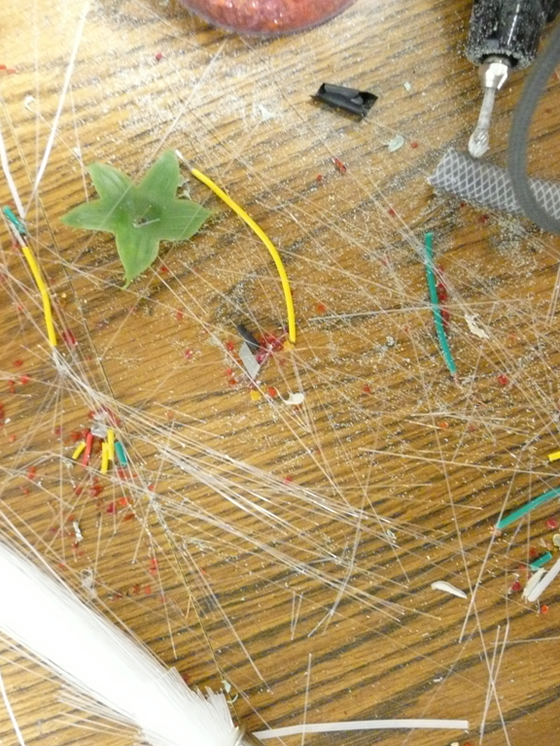
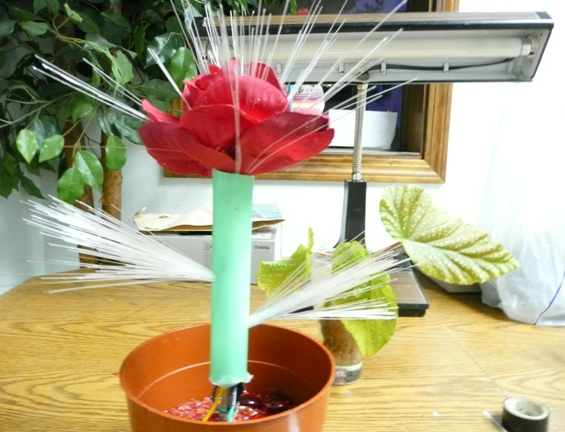
The Aftermath! - Clip the fiber optic leaf strands to vary the lengths of each. This makes the leaves look less uniform, thus expanding the light throughout the leaf. Once you’ve done this, fill the pot with pebbles, covering the battery and wires. Then clean up your mess – Mine was ridiculous!