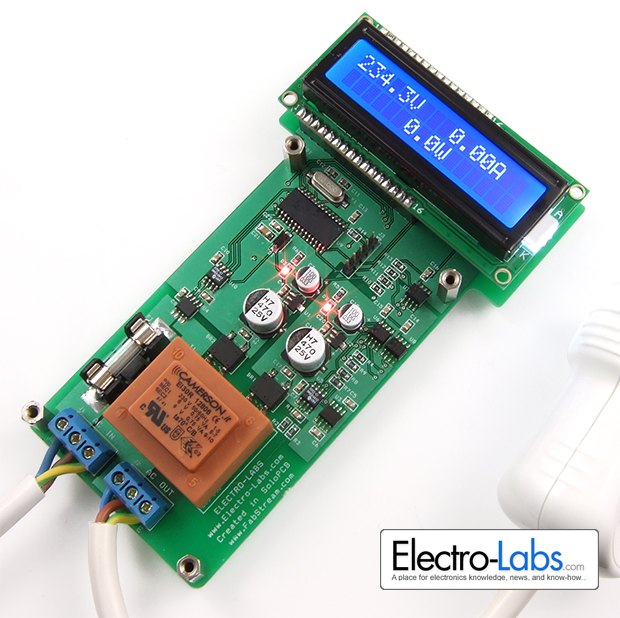
Have you ever been curious about the power consumption of an appliance? For example did you wonder how much it will cost you to leave your television in standby mode whole night? Or did you want to learn how much change your refrigerator settings will make on your electric bill? If your answer is yes, you can use a wattmeter to measure the power consumption of a device. In this project we are building one (Figure 1).
 |
|
| Figure 1. | DIY Digital AC Watt Meter. |
This is an AC Watt Meter which can measure the real power consumption of a device connected to the 230Vrms/50Hz mains line. The PIC microcontroller PIC18F252 from Microchip collects the voltage and the current information with the help of ADCs and then calculates the RMS voltage of the mains line, RMS current drawn by the device and the resulting average power consumption. All these information is then displayed on the dot matrix LCD.
The meter itself doesn’t need an external power source. It is powered from the mains. Despite this, the microcontroller side is fully isolated from the parts interfacing to the mains.
Circuit Design
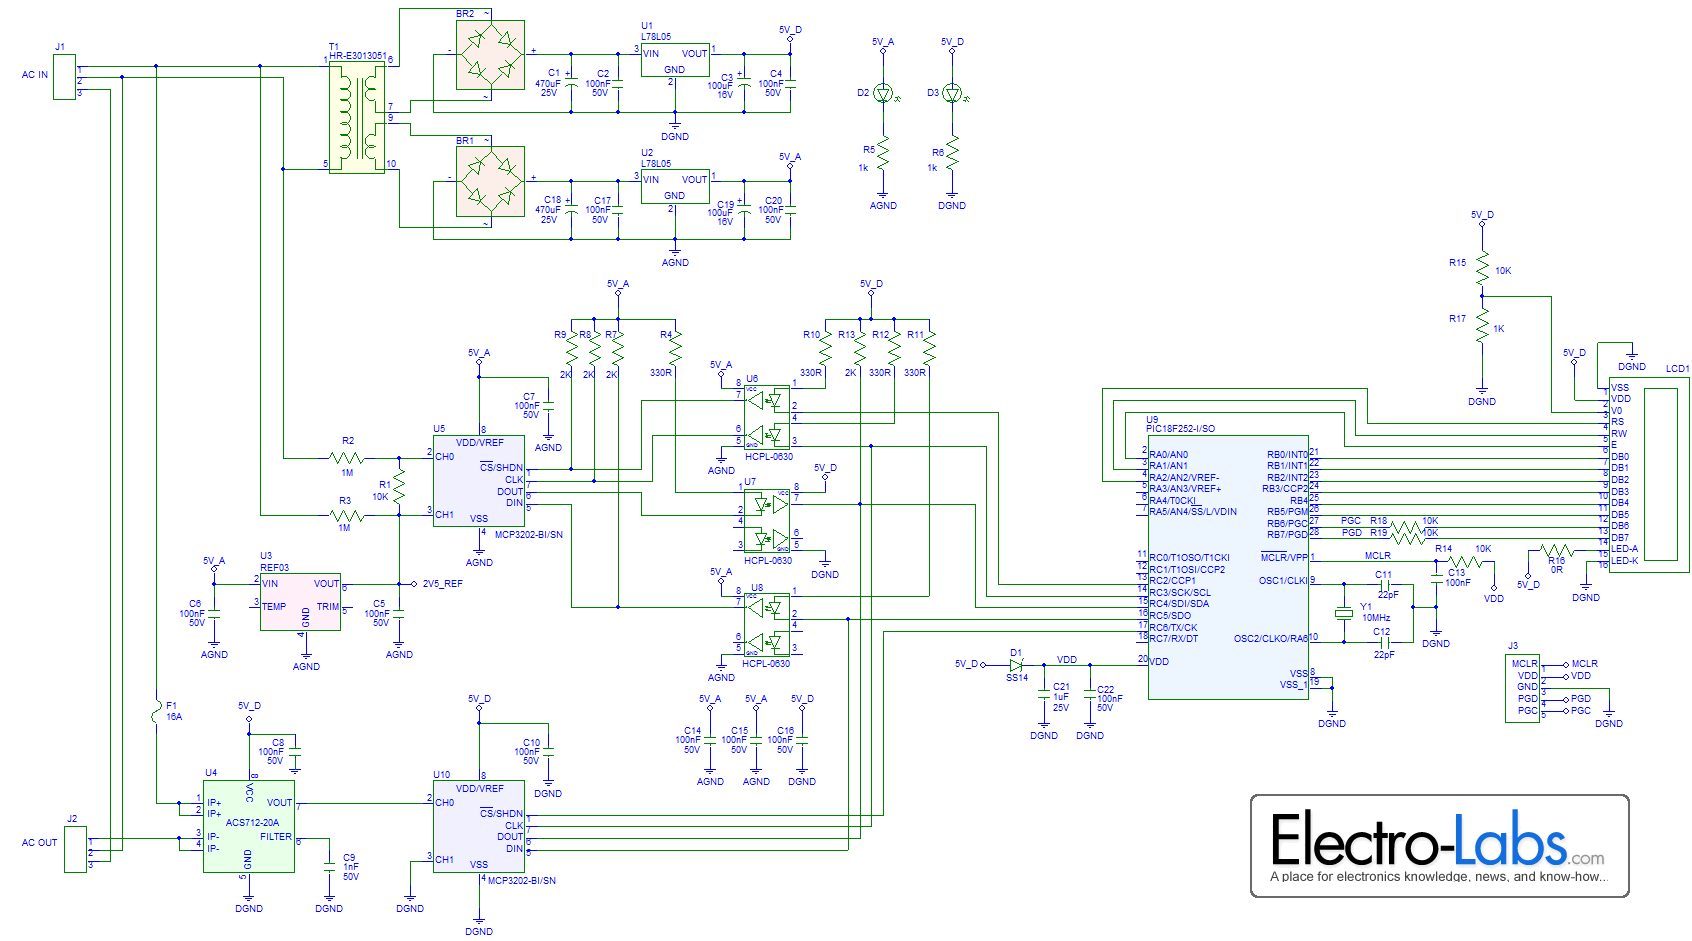
The schematic of the project (Figure 2) is drawn in SoloCapture, the schematic editor of SoloPCB tools. SoloCapture makes the schematic drawing process very easy and fast. You can download SoloPCB tools for FREE.
You can download the SoloPCB design files of the project by using the link in download section. Please check out this video to see how to import the project libraries, open and synchronize the schematic and PCB files.
 |
|
| Figure 2. | Digital AC Watt Meter Schematic Diagram. |
To calculate the power, we need to know the voltage across the load and the current drawn by the load. The voltage that should be measured is directly the mains voltage. We know that the mains voltage is 230 Vrms/50 Hz but it has a 10% tolerance. So the voltage can change between 207 Vrms and 253 Vrms. To make an accurate power measurement, it will be better to measure the mains voltage instead of putting 230 Vrms into the calculations.
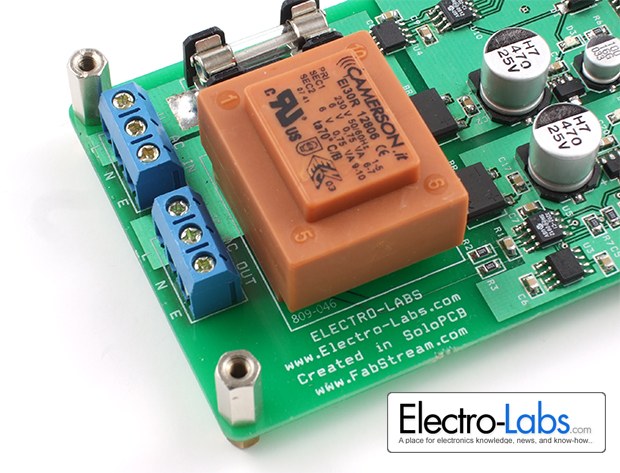
The mains line is connected to the AC IN connector (J1), see Figure 3. For the voltage measurement, a resistor divider network (R1, R2, R3) is connected between the phase and the neutral lines. With the help of the voltage divider, the mains voltage is down scaled at a factor of R1/(R1 + R2 + R3) = 1/201 which converts ±320 V (peak) to ±1.59 V. Then 2.5 V up shifting is applied which finally maps ±320 V to 0.91 V – 4.09 V that nicely fits between 0-5 V with a good level of safety margin.
 |
|
| Figure 3. | Digital AC Watt Meter Input Analog Side. |
After this scaling and shifting process, the voltage across R2 is read by MCP3202 ADC. Then the voltage information is read by the microcontroller in 12 bit format over SPI interface. To isolate the microcontroller part from the section interfacing to the mains, HCPL-0630 high speed optocouplers are used. The second analog input channel of MCP is used to read the 2.5 V reference voltage and use it as the correction factor in the calculations.
While the neutral and earth lines coming from the AC IN connector are directly connected to the AC OUT connector (J2), the phase line is passing through the ACS712-20A hall effect based current sensor (U4) for the purpose of current measurement. The sensor outputs 2.5 V at 0 A. When current flows between the IP+ and IP- terminals, the sensor output changes at a rate of 100 mV/A. So the output voltage becomes 4.50 V at +20 A and 0.500V at -20A. The sensor output is read by another MCP3202 and sent to the microcontroller over SPI. The ACS712 provides internal isolation so no external precaution is required for isolation.
ACS712-20A is capable of reading ±20 A. But considering the current limitations of the terminal blocks and the fuse holder, the AC current path is protected by a 16 A fuse which is connected in series to the phase line.
There are two isolated 5 V sources to power the mains and the microcontroller sides. The transformer generates 2×6 Vrms from the 230 Vrms. Each output is rectified by the bridge diodes and then regulated by the 78L05 linear regulators. D2 and D3 are the LEDs indicating the status of each 5 V.
 |
|
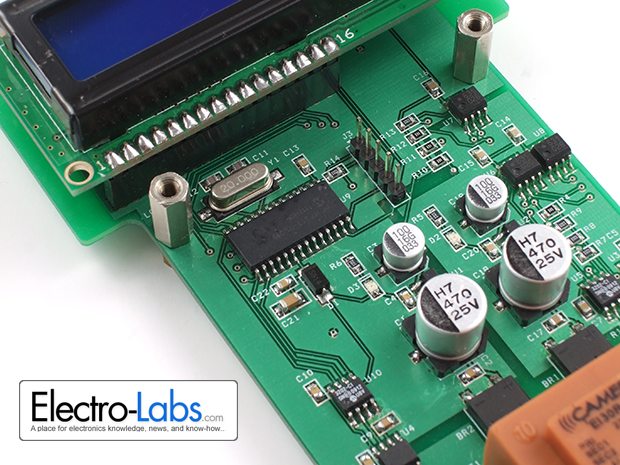
| Figure 4. | Digital AC Watt Meter Component Placement. |
The microcontroller of the wattmeter is PIC18F252. Basically it reads the voltage and the current and calculates the RMS voltage, the RMS current and the average power. Then it interfaces with the LCD and shows all these values. It has a hardware SPI module which lets communicating with the MCP3202 ADCs. On the other hand it interfaces to the LCD over 4-bit or 8-bit interface. The microcontroller’s master clock becomes 5 Mhz when 20 Mhz crystal oscillator is used. There is an onboard ICSP connector (J3) which is used to program the PIC.
PCB Design
The PCB of the project is designed in SoloPCB. SoloPCB is a pack of powerful tools consisting of schematic capture, PCB layout, and integrated autorouting.
 |
|
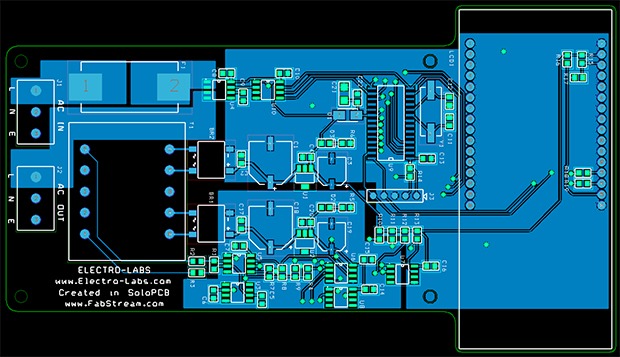
| Figure 5. | Digital AC Watt Meter PCB Layout in SoloPCB. |
Designing the wattmeter as a handheld device was a good idea. The outline of the PCB was drawn accordingly. Autocad was used to draw the outline and the .dxf file was imported in SoloPCB.
All the footprints which are not included in the SoloPCB libraries were created manually. They can be found in the SoloPCB design files.
The lines (phase, neutral and earth) connecting AC IN connector to AC OUT connector were drawn as thick as possible. The bypass capacitors are placed as close to the ICs as possible. Two separate ground planes are drawn for AGND and DGND to keep the ground resistance low.
All the components were placed at the top layer. An acrylic cover was planned to use as a cover for both the top and bottom layers. So the height of the bottom layer would be as low as possible.
Software
Basically the MCU reads the voltage and the current samples every 1 ms and collects 40 sample pairs which means two periods for the 50Hz. Then calculates the RMS values and the average power. 1ms period is generated by using the Timer A module. The module runs in 16 bit mode and generates an interrupt at each overflow. So we assign a start value in each cycle and wait for the 1ms trigger.
After collecting all of the samples, the calculation processes begin. The RMS voltage is calculated by using the equation below,

The RMS current is also calculated by using the same equation.
The voltage and the current samples include the phase relation between the voltage and the current. So active (real) AC power which is V * I* cosθ can be achieved by calculating the average power by using the equation below.

Calculated RMS and power values are displayed on the LCD by using the lcd.h library of CCS C compiler.
The whole CCS C code is provided at the end of the article.
Assembly and Test
The part list of the project is given below
| Quantity | Part Description | Designator |
| 2 | 78L05 5V 0.1A Linear Voltage Regulator SOT-89 | U1 U2 |
| 1 | REF03 2.5V Voltage Reference SO-8 | U3 |
| 1 | ACS712-20A Hall Effect Current Sensor SO-8 | U4 |
| 2 | MCP3202-BI/SN Dual Channel 12 Bit Analog to Digital Converter SO-8 |
U5 U10 |
| 3 | HCPL-0630 High Speed Optocoupler SO-8 | U6 U7 U8 |
| 1 | PIC18F252-I/SO 8 Bit Microcontroller SO-28 | U9 |
| 2 | DF08S 800V 1A Mini Bridge Rectifier | BR1 BR2 |
| 1 | HR-E3013051 230V to 2x6V 1.5VA Transformer | TR1 |
| 1 | TC1602D 2×16 Dot Matrix LCD | LCD1 |
| 2 | 470uF 25V Electrolytic Capacitor 10x10mm | C1 C18 |
| 2 | 100uF 16V Electrolytic Capacitor 6.3×5.4mm | C2 C17 |
| 2 | 22pf 50V 0805 NPO SMD Ceramic Capacitor | C11 C12 |
| 1 | 1nF 50V 0805 X7R SMD Ceramic Capacitor | C9 |
| 14 | 100nF 50V 0805 X7R SMD Ceramic Capacitor |
C2 C4 C5 C6 C7 C8 |
| 1 | 1uF 25V 1206 X7R SMD Ceramic Capacitor | C21 |
| 2 | 0R 1% 0805 Resistor | R16 |
| 2 | 1M 1% 0805 Resistor | R2 R3 |
| 3 | 1K 1% 0805 Resistor | R5 R6 R17 |
| 5 | 10K 1% 0805 Resistor | R1 R14 R15 R18 R19 |
| 4 | 2K 5% 0805 Resistor | R7 R8 R9 R13 |
| 4 | 330R 5% 0805 Resistor | R4 R10 R11 R12 |
| 2 | Red LED 0805 | D2 D3 |
| 1 | 20MHZ Crystal Oscillator | Y1 |
| 1 | SS14 1A 40V Schottky Rectifier SMA | D1 |
| 1 | Schurter 0031.8221 SMD Fuse Holder | F1 |
| 1 | 16A Fuse 20x5mm | - |
| 2 | 1×3 5.2mm Pitch Screw Terminal Block | J1 J2 |
| 1 | 1×5 2.54mm Male Header | J3 |
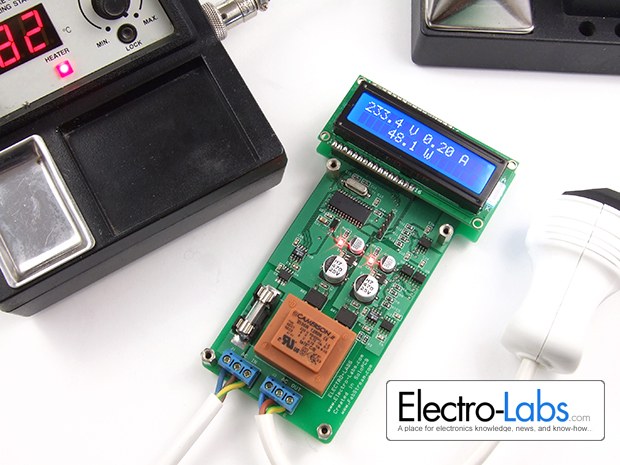
You can see the power consumption of a solder station while heating up below (Figure 6).
 |
|
| Figure 6. | Digital AC Watt Meter power consumption measurement of a solder station. |
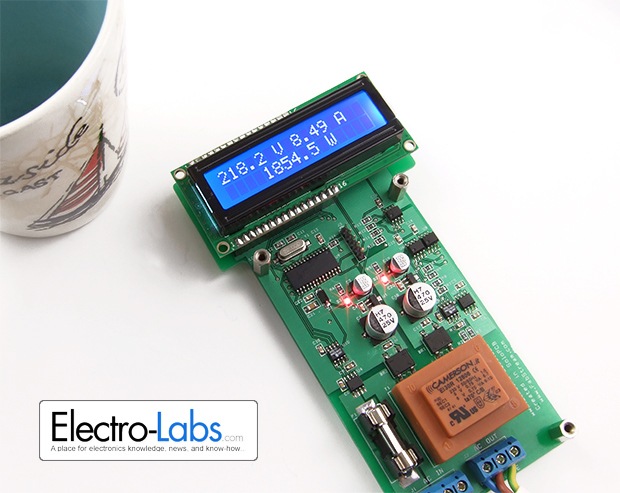
You can see another measurement below. 2KW water boiler is connected to the meter (Figure 7).
 |
|
| Figure 7. | Digital AC Watt Meter power consumption measurement of a 2 kW water boiler. |
Downloads
Source Code (CCS C Compiler) - download
SoloPCB Project Files (Schematic, PCB layout) - download
