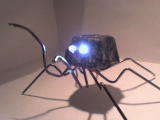
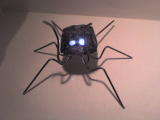
This Instructable will show you how to put together some LeD Spidies for Halloween. They are simple to make and fun to hide in dark corners for guests to find. I have tried to keep this simple and to the point for the younger viewers. If you are after something a little more challenging, perhaps incorporate a vibe motor and some moving limbs to the equation.
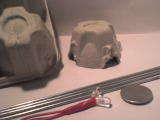
What we will need Hopefully you should be able to find most of what you need around the house.
- 1 X Coathanger (for the legs).
- 1 X Egg Carton. ~ 2 X LeD.
- 1 X Battery (that suits the two LeD's).
- 2 X Short peice of wire or 1 X Long peice of wire to cut in half (you decide).
- 1 X Pliers (to bend wire for legs).
- 1 X Hot glue gun or suitable glue.
- 1 x Large boot (to squish your Spidie if they go wild crazy)
Before we go any further. Who doesn't know what an LeD is? An LeD is a Light Emitting Diode. Basically it is like a tiny little globe that shines light. They come in lots of different colours and strengths. Using them will be a great way of making your Spidie stand out in the dark. They are also going to save the world, especially the blue ones. Remember that kids.
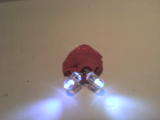
Making the body In this step we will make the body for our Spidie. Take your egg carton and cut out one of the holders. We only need one each. So there is plenty more to make others. Once you have removed one section, trim the bottom edge up so it is neat. Make two LeD sized wholes at the front to suit your lights. Insert them and attach the battery. To save having to solder just use some electical tape to hold the battery to the wires. This will be it's body.


Making the legs In this step we will make the Spidies legs. You may need some help bending the coat hanger wire if it is a little stiff. The leg shape all depends on the final look you are going for. Will he be aggressive? Do we need his front legs in the air? We need an upside down V in the middle of each section to allow our egg carton to sit on top. You will need to take two of the pieces and bend them to suit the middle 2 pairs of legs which will make a X. Then takes the other two pieces and bend them to suit the front two legs and the rear two. Like I said before the shape is up to you and it doesn't matter if they are a little uneven, it adds character. Once you have bent the legs sections it is time to glue the legs together.. It may be best the to do one set at a time.
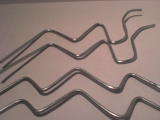

Attaching the body to the legs. This is the final stage of the spidie. we need to use your glue to attach the body to the legs. If you put a fair amount on the upside down V section of the legs then you should be able to just place the body on top and it will hold. If it does not apply a little more glue...
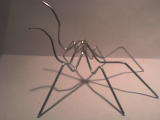

Decorate your Spidie How you decorate your spidie is up to you. You can make him as scary as you like or as friendly as you like. You should be able to use permanent marker to color him black if you wish. Make lots of them and have your self a Spidie outbreak!
