Cesca Fleischer, Michelle Stone, Lourdes Vasquez
autodesk.com
Part 1 - Eagle 9.3
Part 2 - Eagle 9.4
Eagle 9.5
We at Autodesk have been hard at work on the capabilities of EAGLE in anticipation of what we hope you’ll find is a pretty spectacular release! Quite literally taking a page out of our support backlog, we have introduced a number of items that users have been asking for- (pleading!) for years! That said let’s get into the details! For those of you too anxious to read, the tlDr; version includes:
- Shared Libraries
- Design Manager in Schematic
- Persistent Groups
- Re-Route Command
Improved! Shared Libraries
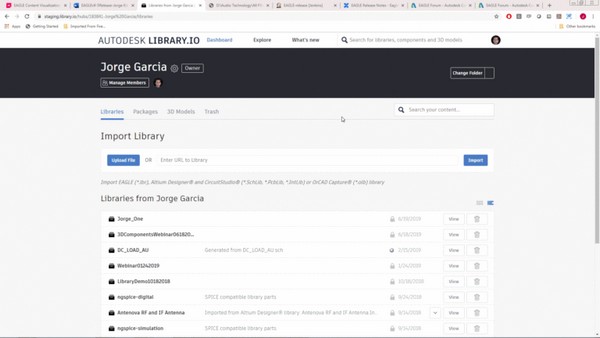
The ability to share libraries is here! Invite members to a Managed Folder and they will be able to edit any content within that Managed Folder. What’s more, access to those libraries is available across any machine you’re using to run EAGLE (Figure 14).
 |
|
| Figure 14. | The ability to share libraries in Eagle 9.5. |
All managed content now resides within a Managed Folder. Create and delete Managed Folders in your library.io Dashboard. Assets can only reference content within the same Managed Folder. So, if you copy-paste assets between Managed Folders, those assets will get forked. That means a copy of the asset is made in the new Managed Folder and this copy is completely independent of the original part so changes made to it will not transfer back to the original asset. This protects the original asset from modifications made by downstream users who will adapt it to their purposes. Free Version users can have one managed folder of their own but can be a member of an unlimited number of managed folders. Premium users will be able to own up to 16 managed folders.
New! Persistent Groups
The ability to select and edit one or even multiple items has always been essential to any engineer or PCB designer’s productivity. However, it was evident from years of user feedback (and our own frustrations) that somewhere between design blocks and the “click-and-drag -> change” editing paradigm, was the need for the ability to store and recall any collection of objects. Well, in EAGLE 9.5 life has just gotten easier with the introduction of Persistent Groups (Figure 15)! Organize any aspect of your design and select, move, & edit those items faster and easier than ever before!
Some of the cooler aspects of persistent groups include:
- The ability to name groups and locate them, by name, in the Design Manager or command line
- Ability to quickly Add/Remove items to/from a group
- Ability to select the group and use the Change command or the Object Inspector to perform operations on the group members
- Groups of groups! …ie establish any level of nested (groups) hierarchy
- Attributes can be added to the new groups themselves thereby giving you a place to attach any information you might determine relevant when browsing your design
- In the schematic, groups include an optional bounding rectangle around your groups and names to help organize your drawings
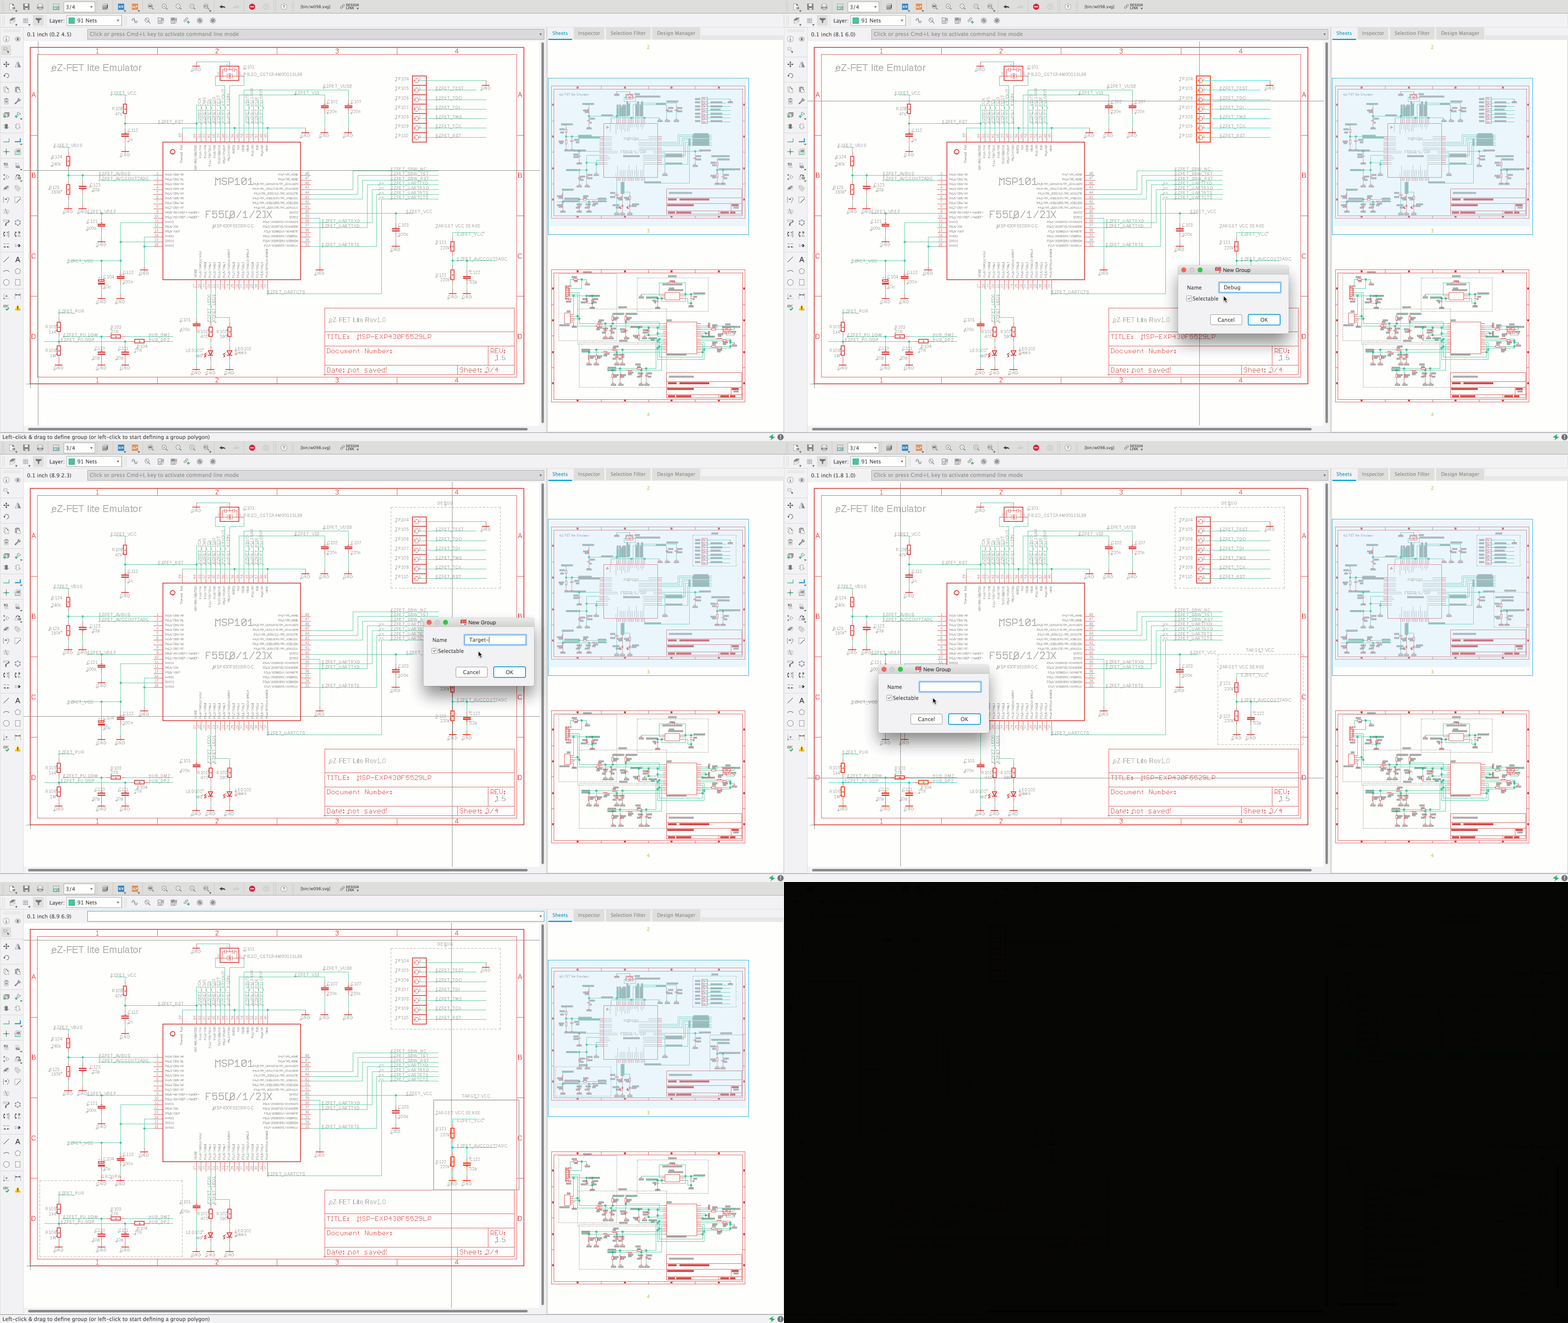 |
|
| Figure 15. | In EAGLE 9.5 life has just gotten easier with the introduction of Persistent Groups. |
Improved! Design Manager Comes to Schematic
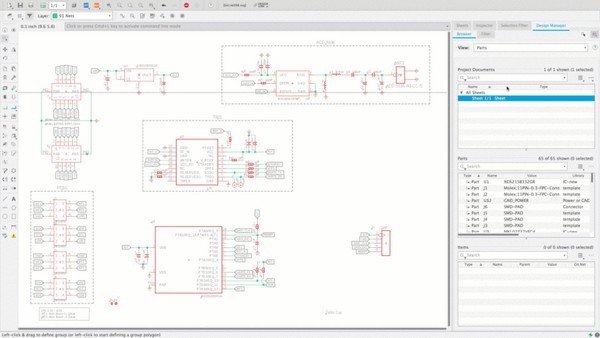
Design Manager in EAGLE PCB makes it SO much easier to find assets, launch commands, and explore your design more generally. That said, being PCB-only was a huge limitation and in EAGLE 9.5 we have added the Design Manager to schematic (Figure 16)!
 |
|
| Figure 16. | In EAGLE 9.5 we have added the Design Manager to schematic. |
Browser Tab
The browser tab contains all the functionality the Design Manager had prior to the addition of the filter functionality. Existing users will be very familiar with this. The biggest difference is that the Design Manager can now filter based on the persistent groups in your design.
In the Browser Tab you can search for components, Ripup and Quick Route traces and much more. In the Groups view you can edit your persistent groups, clear them, delete them or even nest them. This functionality allows you to very quickly make changes to the specific components you want to modify.
New! Filters
Querying objects and locating specific items with the Design Manager is a huge productivity win for users! Precisely identifying sets of objects that may or may not share similar properties and quickly recalling them has always been a challenge. One that limits what we can do in the future to extend things like Design Rules, Groups, Classes, etc.
EAGLE 9.5 introduces Filters as the first step in our effort to explore these designs and puts us on a path toward many of the advanced features we’d like to make available in the future. You can now easily identify design objects based on type, properties, memberships, and attributes (Figure 17). Use the new filters feature to find all parts with a specific name, substring pattern, or package type. In addition you can locate all parts with specific pins, or for example all nets that belong to a specific bus.
 |
|
| Figure 17. | EAGLE 9.5 introduces Filters: Example filter locates all resistors with values larger than or equal to 10k. |
Save and recall Filters and create more flexible groups where membership is guaranteed even before an object is added to the design. As your design progresses you can use these filters to form selections that include the new assets that fulfill the filter criteria. Used in conjunction with persistent groups you can very quickly make changes to your design
New! Libraries: Popularity Score
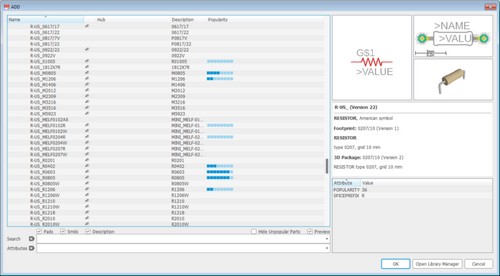
It’s always comforting to know you are walking a path others have followed. There is a sense of safety attached to it. Especially when starting out it helps to know what parts are known-good and have been used by other designers. With that in mind EAGLE’s built in libraries now support popularity scores (Figure 18). This lets you know how frequently certain parts get used so that you can use them with confidence.
 |
|
| Figure 18. | EAGLE 9.5 built in libraries now support popularity scores. |
The popularity scores are only available for managed libraries. Users can also define popularity in their own designs by creating a POPULARITY attribute.
Improved! Reroute Command
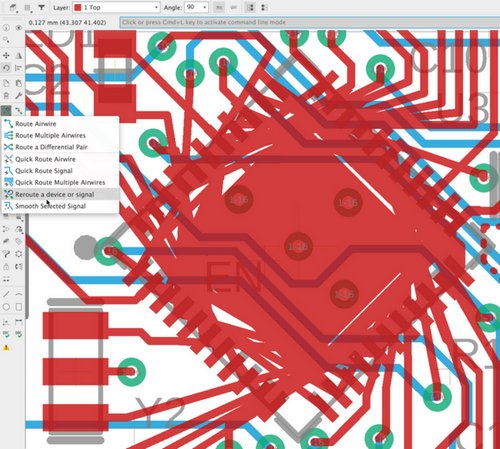
If you’ve moved a component in Fusion and pulled it back into EAGLE, or changed out a package for a part in your schematic (eg. swapping a SOIC for a QFN) you’ll find that PCB routing can leave some pretty catastrophic routes (Figure 19).
 |
|
| Figure 19. | If you’ve changed out a package for a part in your schematic you’ll find that PCB routing can leave some pretty catastrophic routes. |
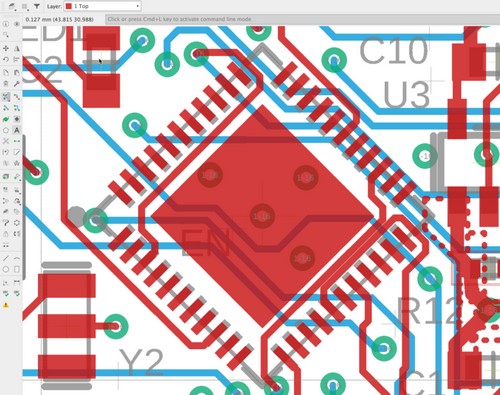
To speed things along, EAGLE’s new REROUTE command enables you to quickly Ripup and Quick Route the affected signals making short work of producing clean, sensibly routed changes to your design. We know this will help you stay in better sync with your mechanical engineer or track with your schematic or 3D PCB more effectively (Figure 20).
 |
|
| Figure 20. | EAGLE’s new REROUTE command enables you to quickly Ripup and Quick Route the affected signals. |
Improved! Locking update!
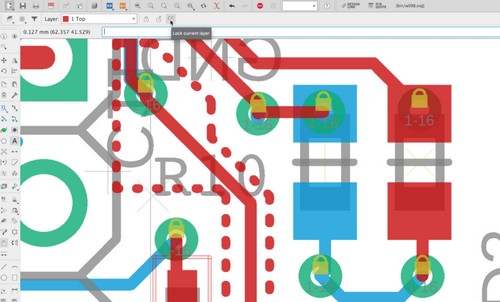
Taking the time to precisely place your components will make your life a whole lot easier when it comes time to route everything. It will also give your board its best electrical performance. EAGLE has had the trace and component locking mechanism that will guarantee critical objects will not be moved by mistake and EAGLE 9.5 has extended locking with additional options including (Figure 21):
- Lock all objects
- Unlock all objects
- Lock objects on the currently active layer
 |
|
| Figure 21. | EAGLE 9.5 has had the trace and component locking mechanism that will guarantee critical objects will not be moved by mistake. |
Improved! CAM Processor
The CAM processor has been enhanced to support the output of Pick and Place files that your assembly house can use to get your boards assembled. Additionally, when setting up the layers in your Gerber output you can now leverage your existing layer presets to speed up the configuration process. We’ve also added some feedback related to variants to guide users on getting the proper output.
Eagle 9.6
Splines
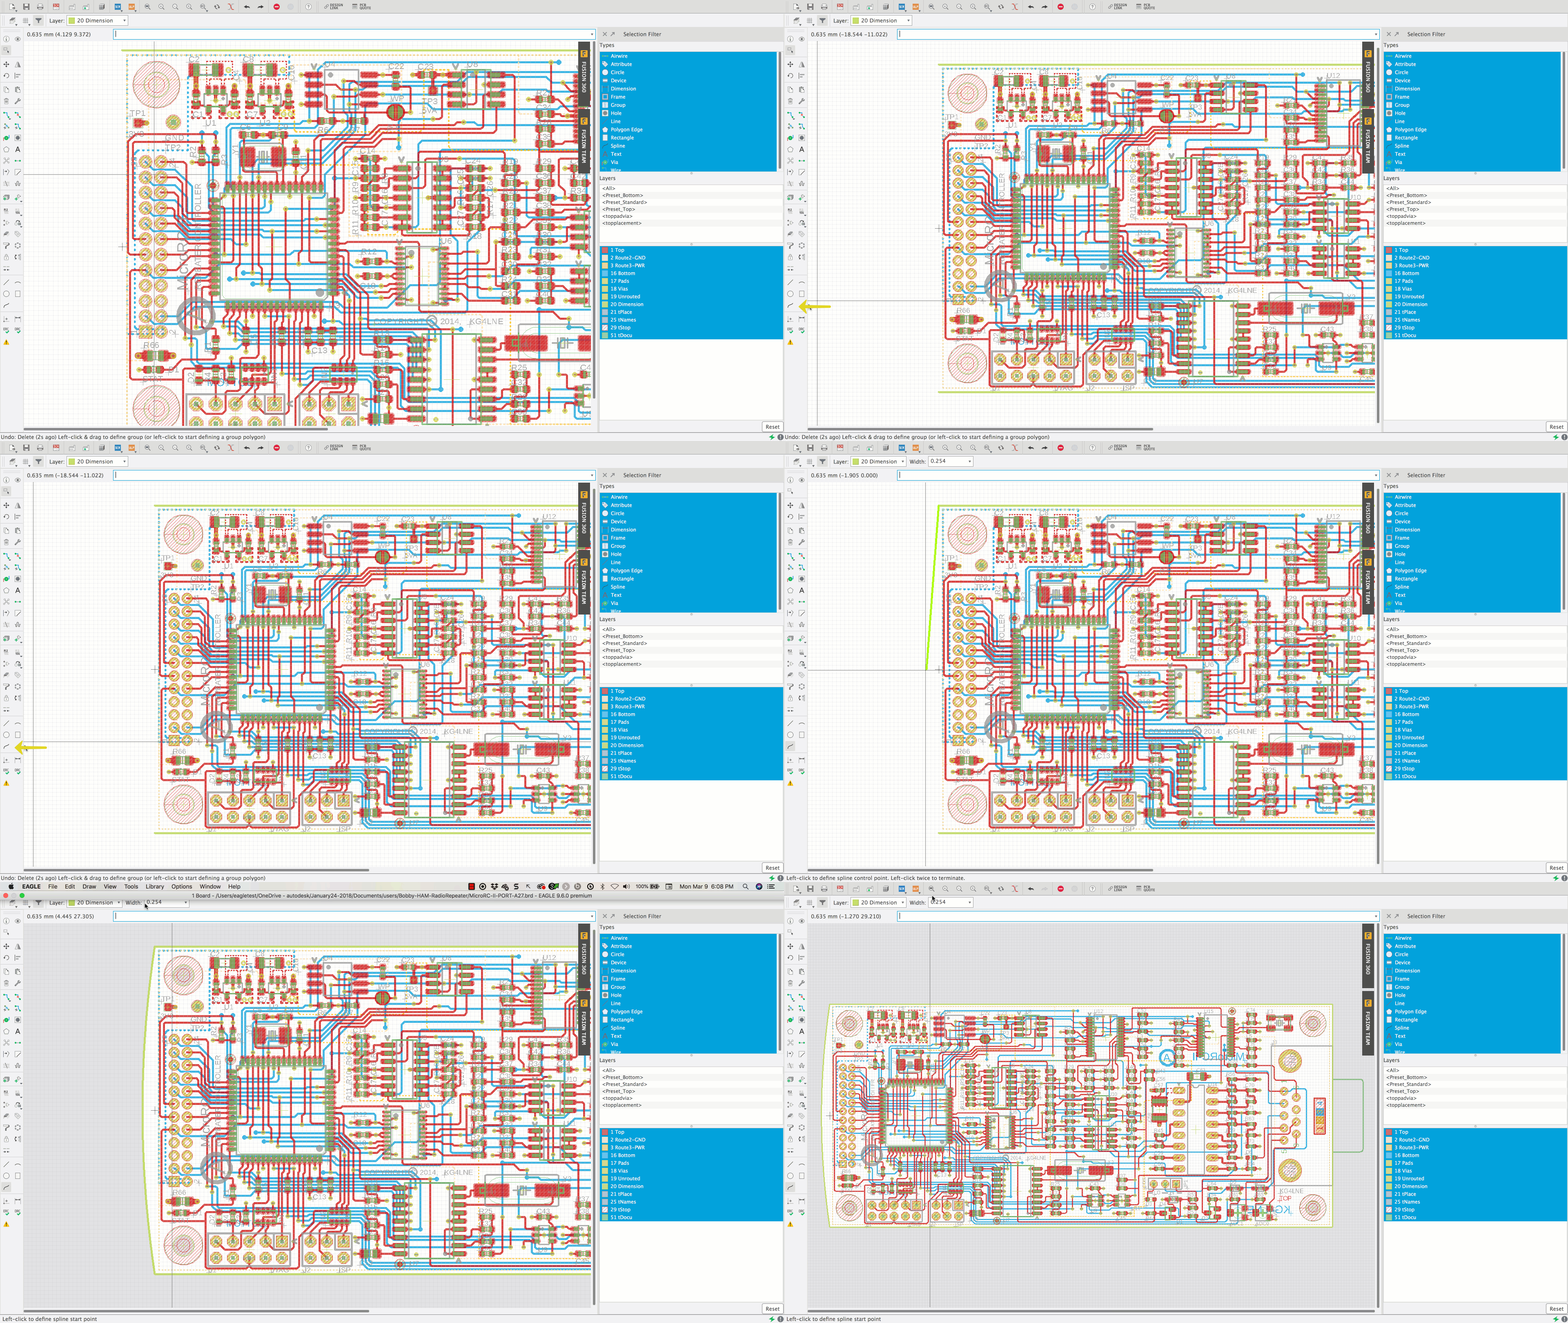
Easily draw curved lines using splines with up to 2 points of control before ending with the latest Autodesk EAGLE release. You no longer need to use a series of arcs and lines to accomplish a contoured shape for your board outline.
You will notice that the drawing tools now include the Spline command (Figure 22).
 |
|
| Figure 22. | Easily draw curved lines using splines with up to 2 points of control before ending. |
After selecting the spline option:
- By left-clicking you’ll begin drawing the spline as a straight line.
- The next 2 clicks will be used for your curvature control.
- Third and final click will be to finish the spline geometry.
You can end the spline after the one control point defined by doing a double left click at the end point.
Import 3D PCB from Fusion 360
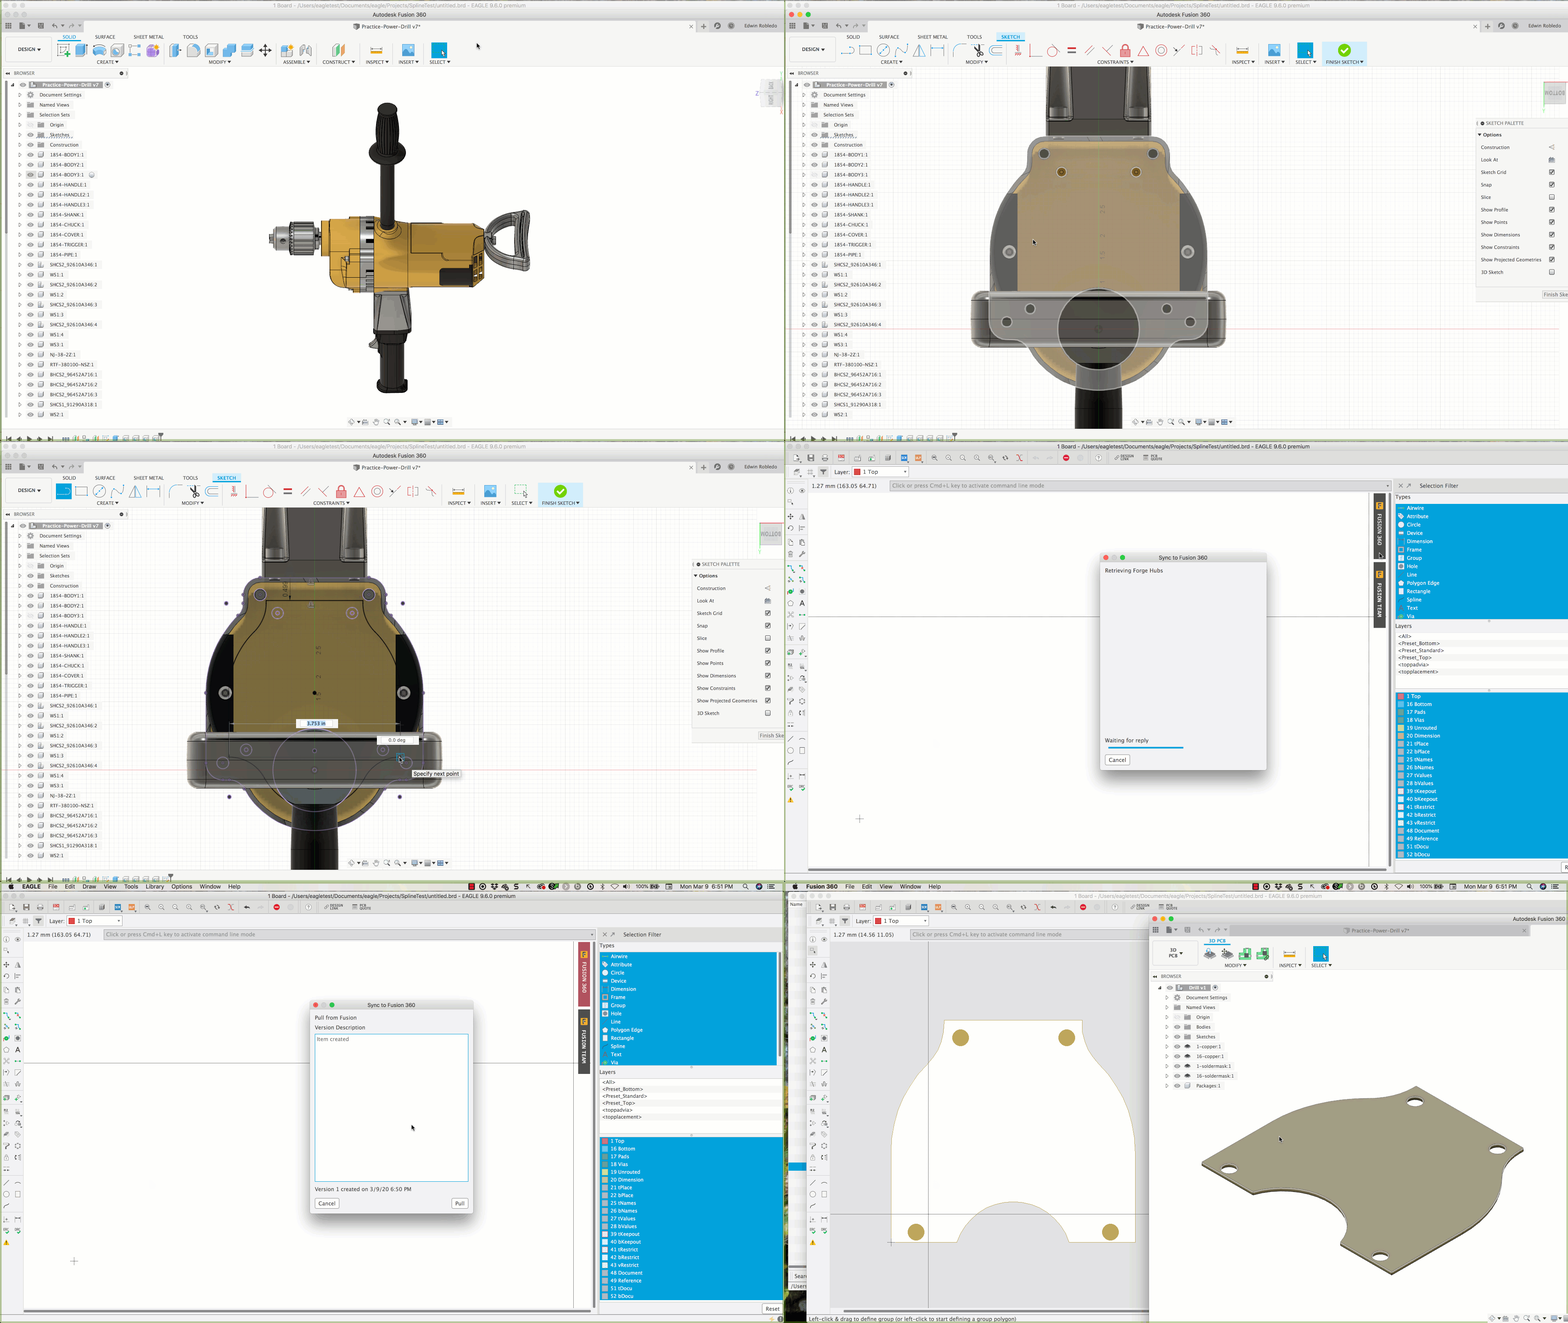
The latest Fusion 360 update includes a 3D PCB editor that can be generated by a sketched outline drawn in the design workspace or a projected geometry from an existing enclosure. With the extended drawing capabilities of EAGLE to include splines, it’s now possible to capture 3D PCB geometry directly into Autodesk EAGLE for your board outlines.
Use Splines tool to define custom PCB curved outlines. We are using the newly implemented Spline command to define and capture complex geometry curvature for the circuit board outline (Figure 23).
 |
|
| Figure 23. | EAGLE 9.5: Import 3D PCB from Fusion 360. |
